Automate Invoice Processing with n8n and Eagle Doc
In this example we will show you a very basic workflow on how you can extract invoice data with the Eagle Doc Finance API within a n8n workflow. The workflow gets triggered whenever a new document is uploaded to a folder in google drive. Then it extracts information and stores them in a google sheet. This workflow shows the basic usage and provides a starting point for further extension. You can extend this workflow for example to fetch automatically invoices from your email account, store the invoices in a specific folder after processing or upload them into your document management system.
For this introduction we take the following assumptions:
We will create the following basic workflow to extract information from newly added invoices and store the information in a google sheet.
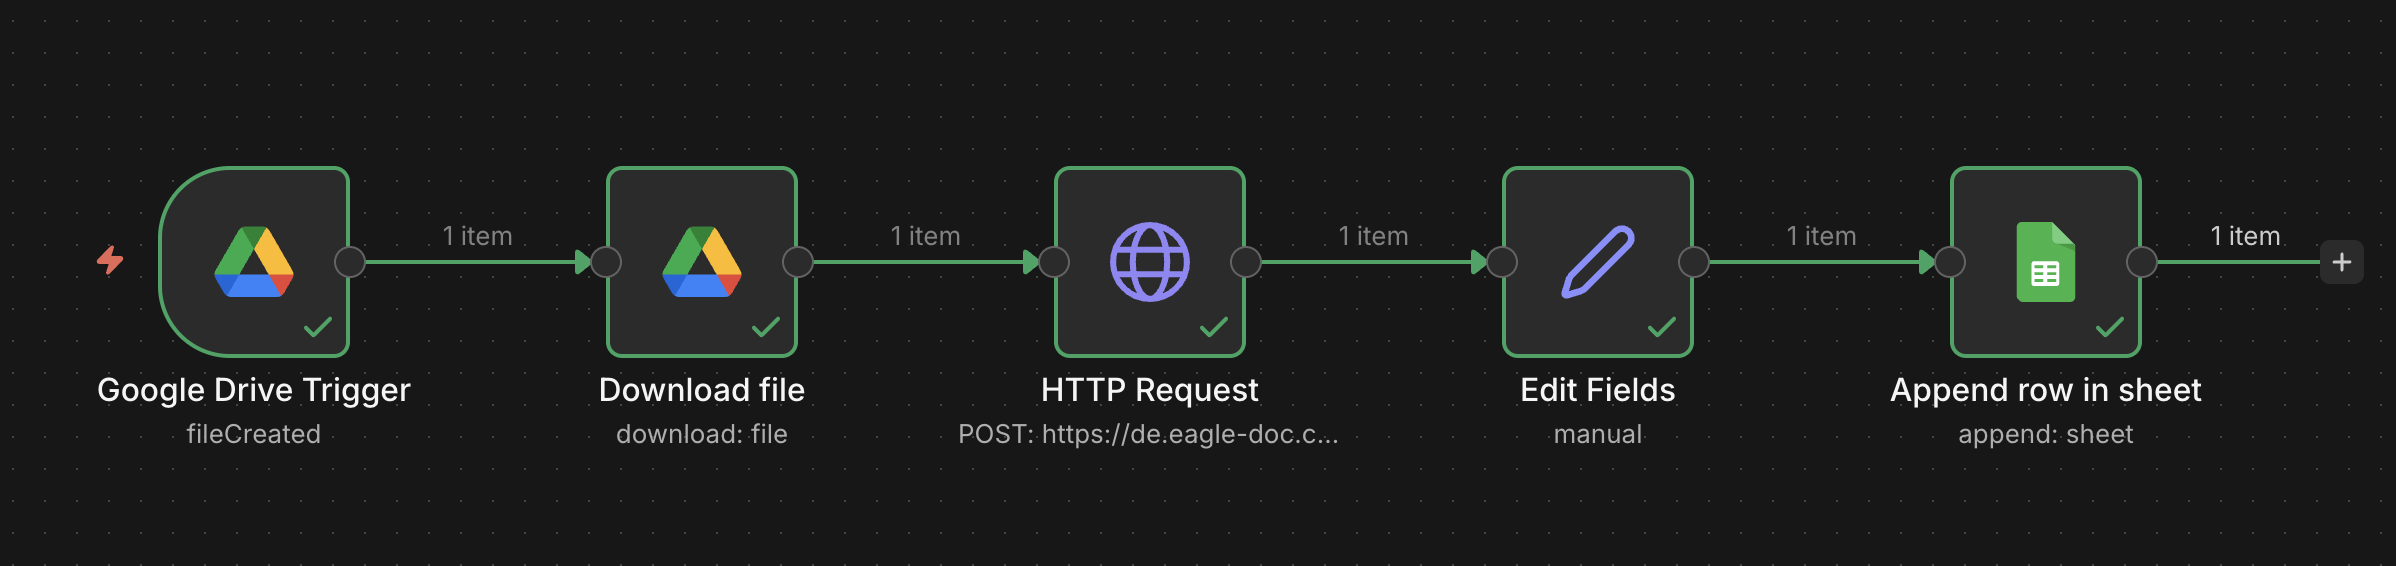
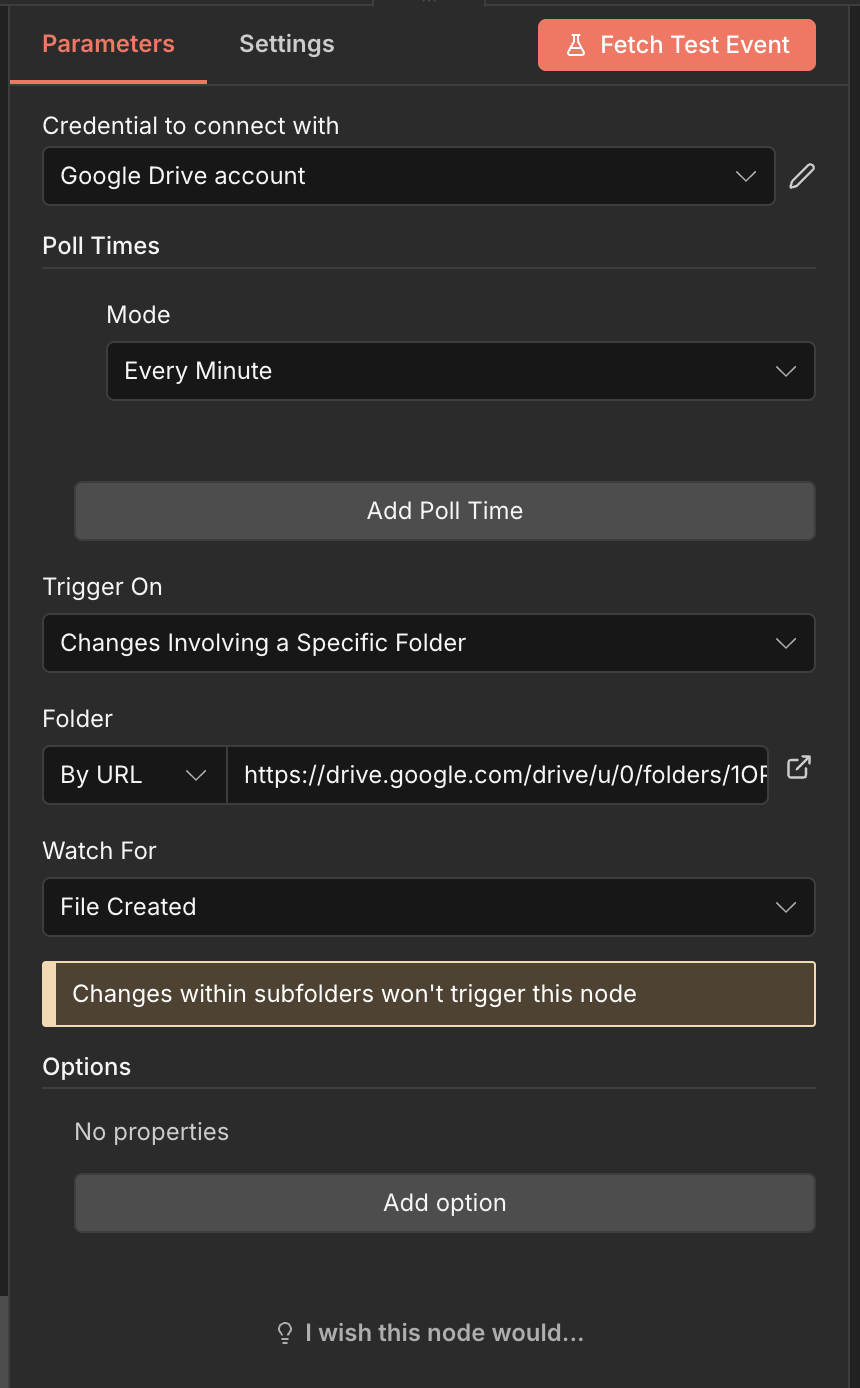
Let us start with the "Google Drive Trigger", the first node on the left. This node shall start triggering the workflow as soon as there is a new file added to a dedicated folder in google drive. You will find this node when searching for "Google Drive" in n8n.
First create a new folder in google drive which will later store the invoices. After you have created the folder, copy the url from your browser.
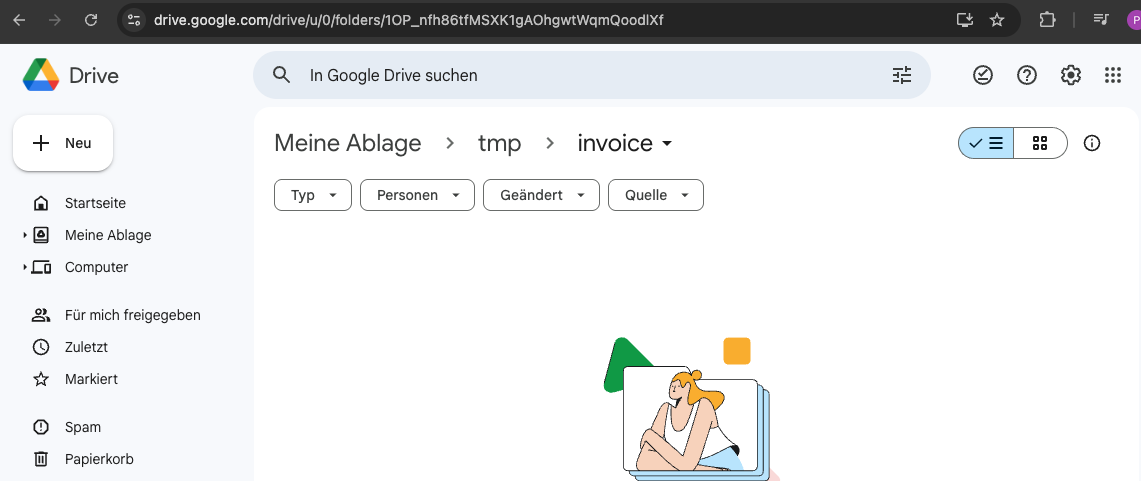
The url will now be used for the node configuration. Copy the url in the Folder section like shown below. If there is another folder option selected like "From list" or "By ID" change it to "By URL". Now you can also change the interval how often n8n shall check the folder for changes. In this example we have set it to "Every Minute". Check also that the other settings like "Trigger On" and "Watch For" are set correctly.
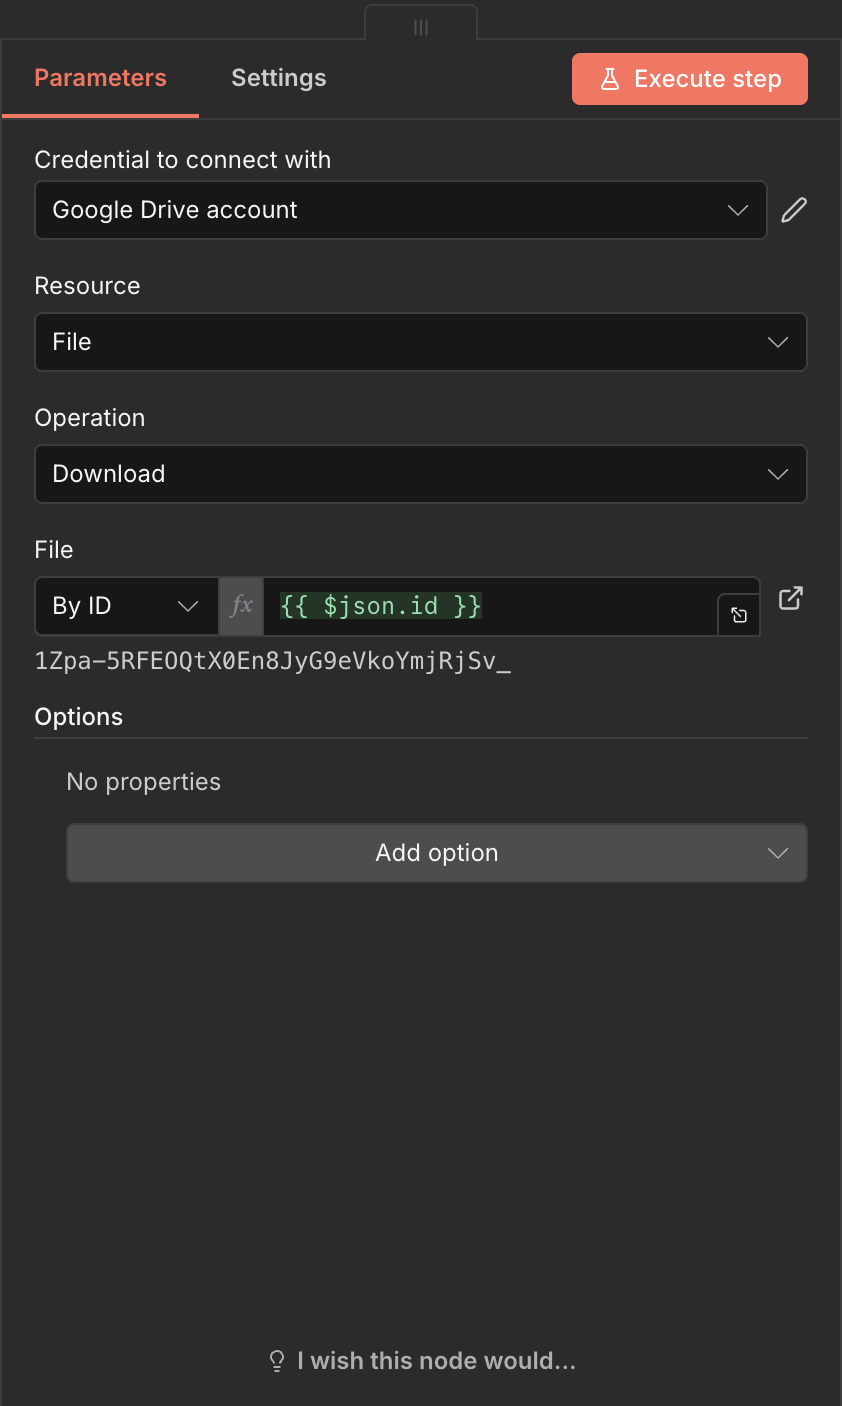
The "Download File" node can be found as well when searching for "Google Drive". The important setting is in section "File". Here we have to set "By ID" and use {{ $json.id }}. You can either type it manually or just drag and drop the field from the left side. In order to do this you have run the previous node first.
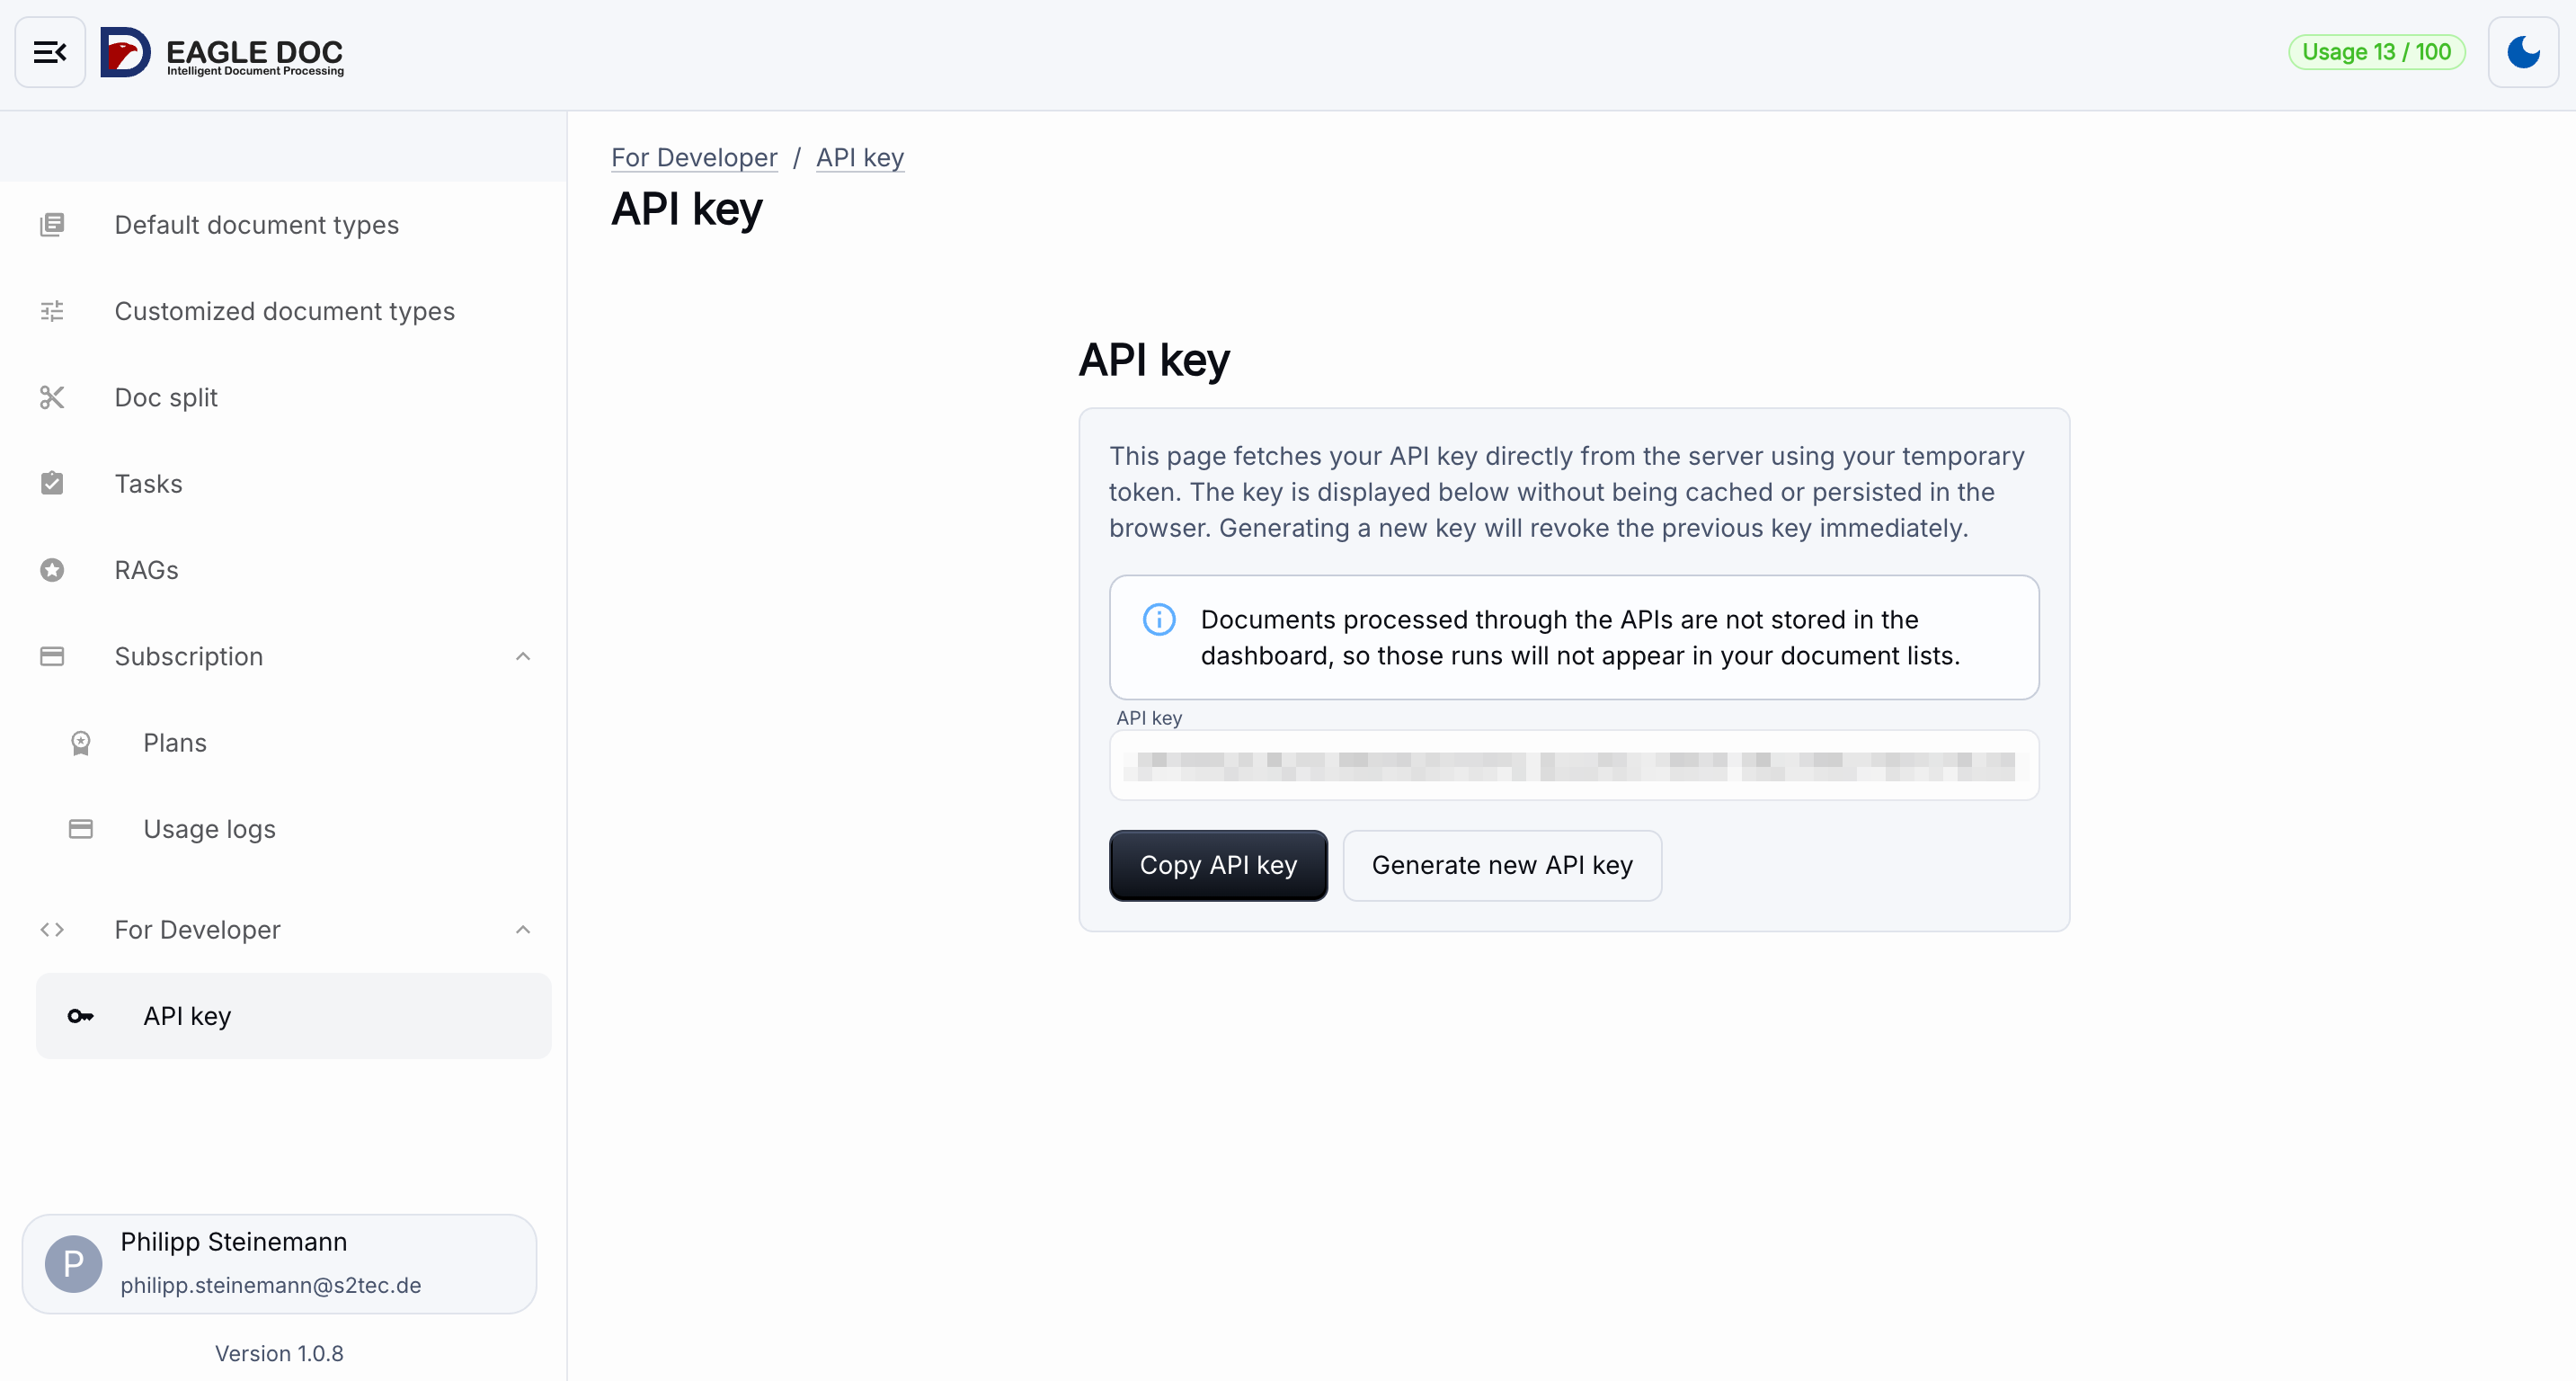
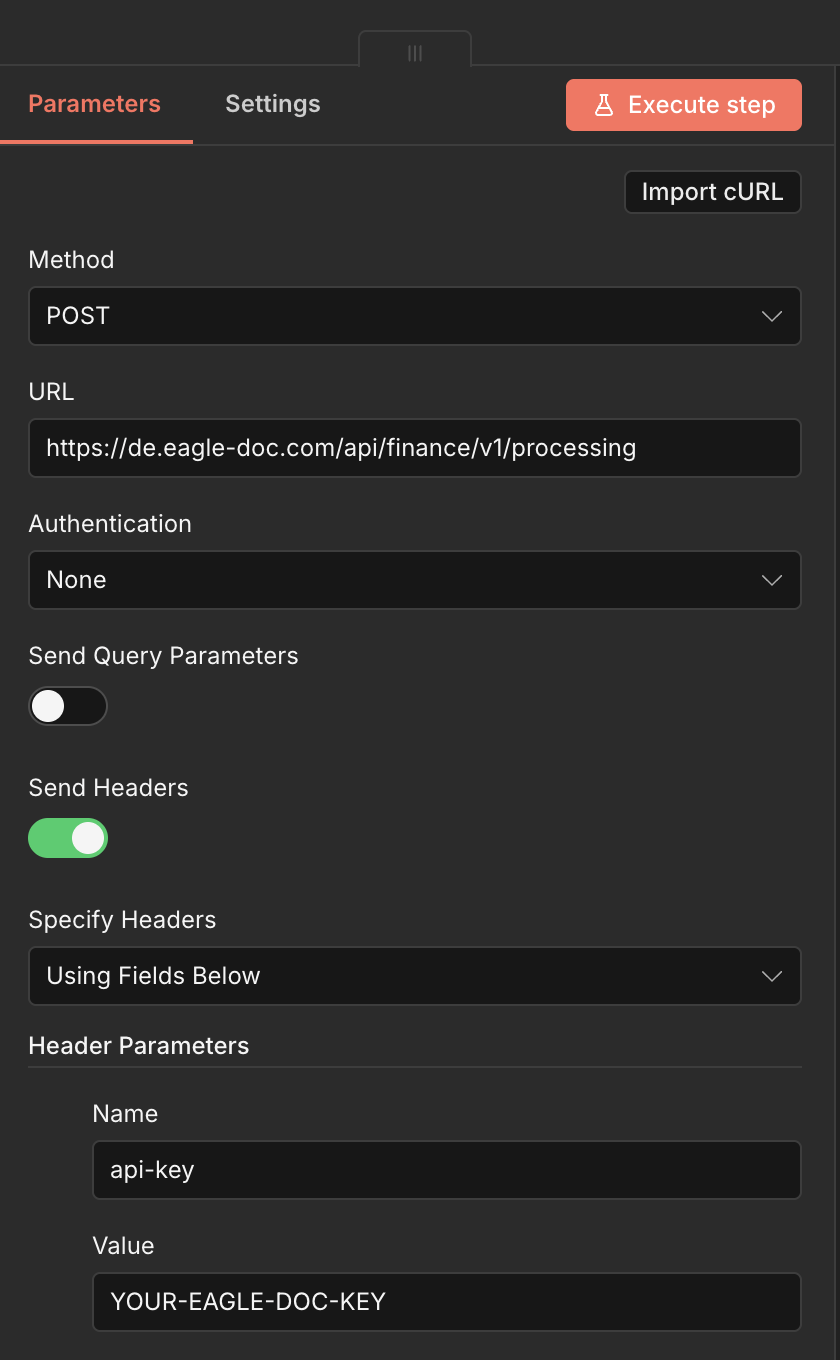
Our next node is the HTTP Request node which will call the Eagle Doc backend. The "Method" to use is "POST" and the "URL" for the finance endpoint is: https://de.eagle-doc.com/api/finance/v1/processing. As the Eagle Doc backend uses an API key, you can set "Authentication" to "None". The "Send Headers" option needs to be activated and the content of the parameter for the header with the name "api-key" needs to be your Eagle Doc API key which you have received via the dashboard.
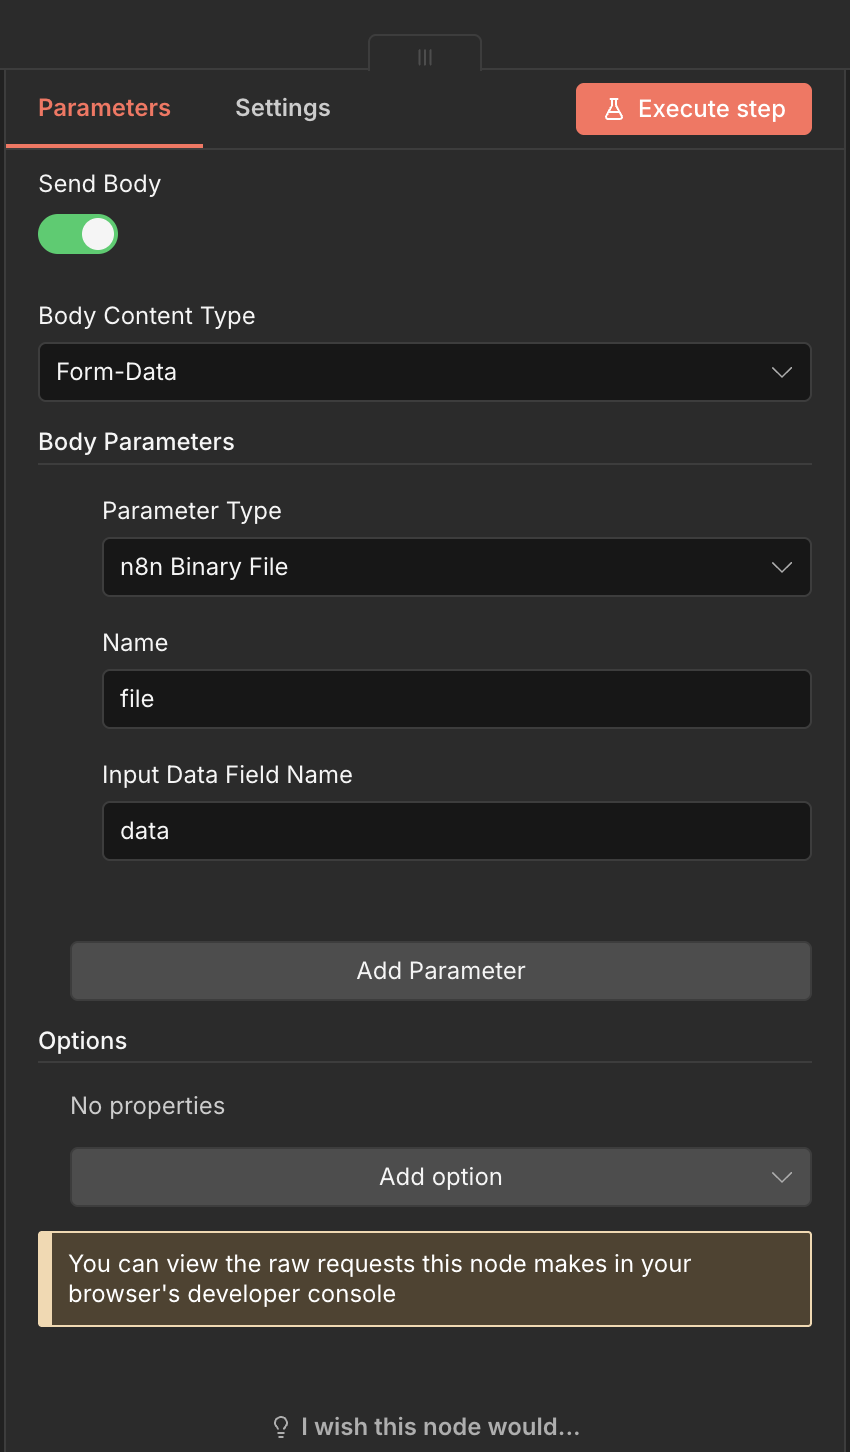
Next, still in the HTTP Request node you need to set up the "Body Content Type". The type needs to be "Form-Data". Additionally the "Body Parameters" need to be set to "n8n Binary File". As name you have to set it to "file" and "Input Data Field Name" needs to be "data". This is how you receive the information from the previous node (see Download file).
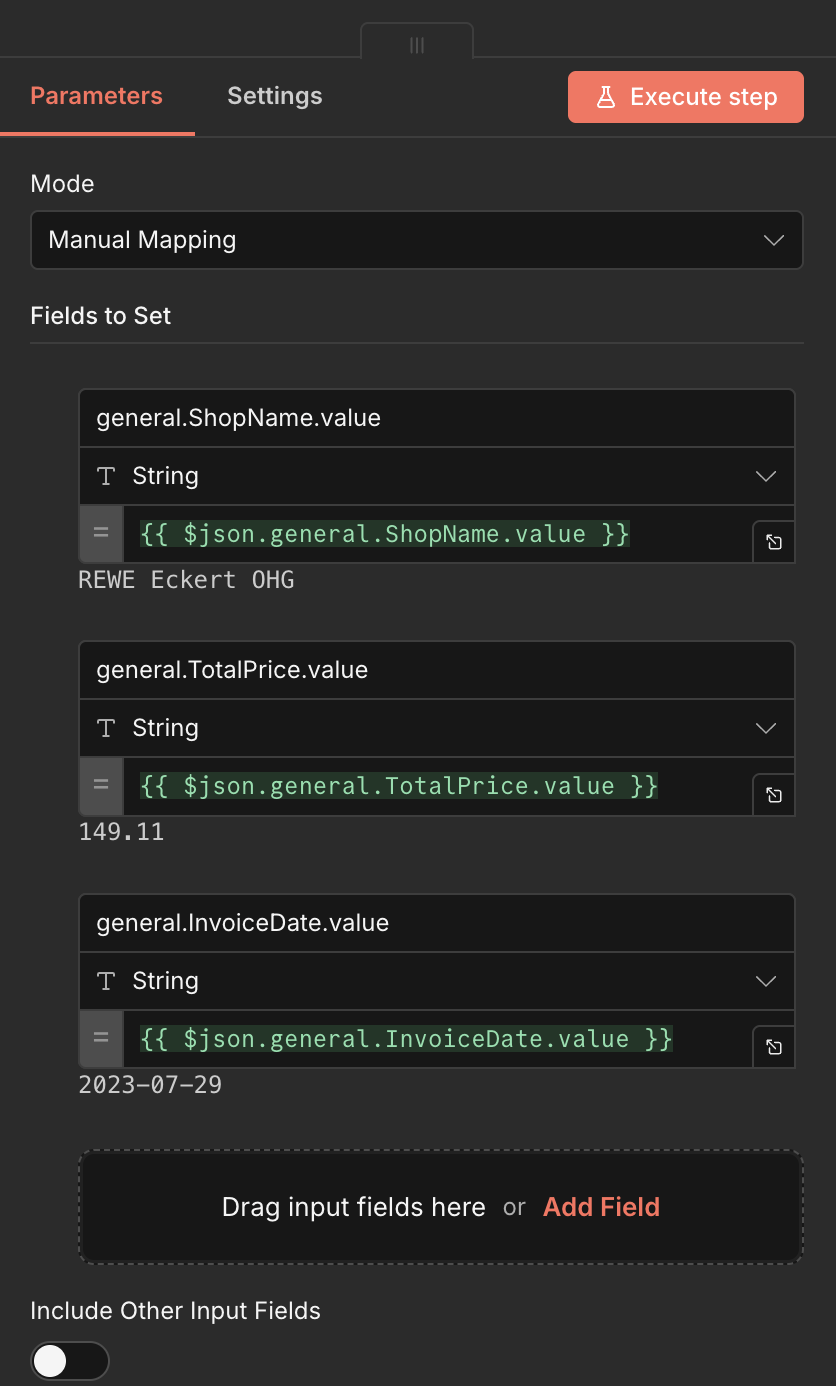
Like before, if you have executed the previous node, you can drag and drop the information which were provided by the Eagle Doc API directly. Additionally you can type the field names also like shown below.
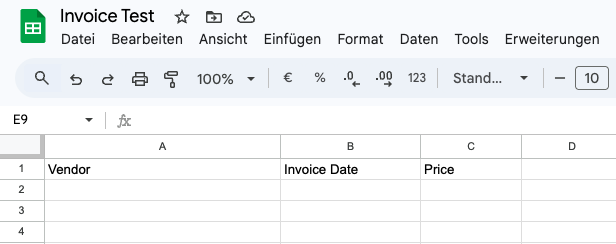
In order to append information to a google sheet, we need to create one. So create a new google sheet in a folder of your choice. Add the following header information in the file: "Vendor", "Invoice Date", "Price". An example is shown below.
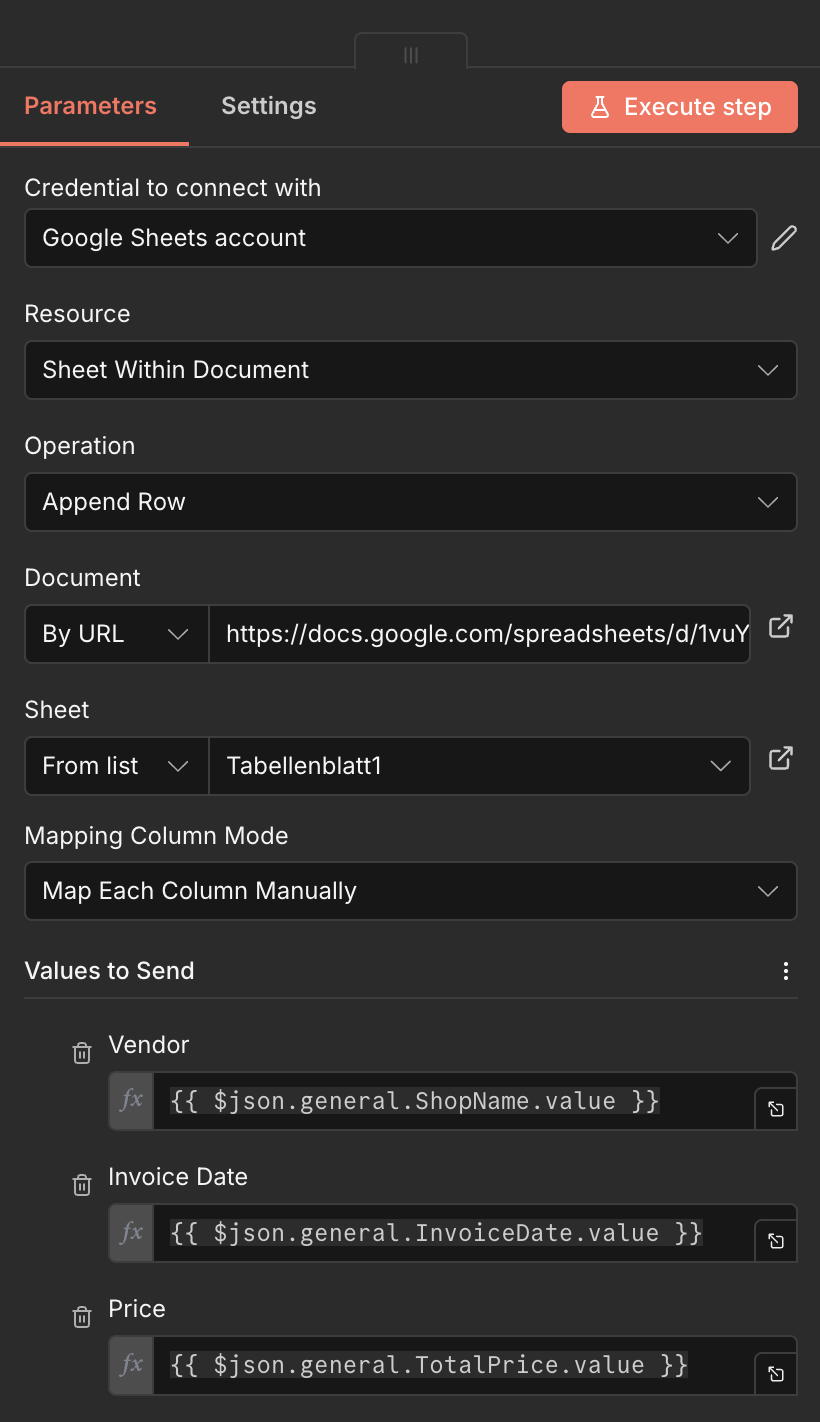
The next step is to configure the "Append row in sheet". This node you will find when you search for "Google Sheets" in the search nodes panel of n8n. Like in our previous step to select the folder, we use the same approach and use the url of the file. So copy the url of the document in the "Document" section with the "By URL" configuration. Additionally you need to select in "Sheet" the tab on where you want to add the information. In our example it is "Tabellenblatt1". In this example we will map the data manually to the columns so select in "Mapping Column Mode" the option "Map Each Column Manually". Now you can again, either drag and drop the information accordingly or write it like shown below.
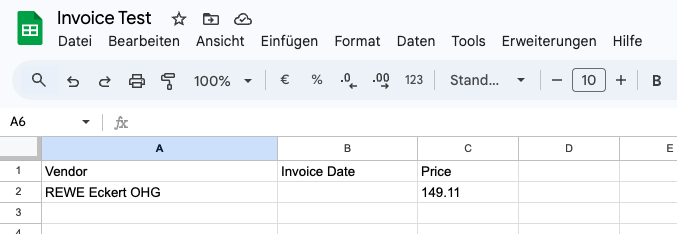
We have now configured everything for our basic workflow to extract invoice information automatically. You can publish your workflow and let it run automatically whenever a new invoice is uploaded to the google drive folder. For testing, you can also trigger it manually and see the newly added information in your invoice google sheet.
Sign up for Eagle Doc today and get your free API key to start building powerful workflows with n8n.
Get Started for FreeCopyright © S2Tec GmbH